Thursday, July 28, 2022

ZFSSA replicating locked snaphots to OCI for offsite backup

ZFSSA replication can be used to create locked offsite backups. In this post I will show you how to take advantage of the new "Locked Snapshot" feature of ZFSSA and the ZFS Image in OCI to create an offsite backup strategy to OCI.

ZFSSA Snapshot Replication
If you haven't heard of the locked snapshot feature of ZFSSA I blogged about here.  In this post I am going to take advantage of this feature and show you how you can leverage it to provide a locked backup in the Oracle Cloud using the ZFS image available in OCI.

In order to demonstrate this I will start by following the documentation to create a ZFS image in OCI as my destination.  Here is a great place to start with creating the virtual ZFS appliance in OCI.

Step 1 - Configure remote replication from source ZFSSA to ZFS appliance in OCI. 


By enabling the "Remote Replication" service with a named destination, "downstream_zfs" in my example, I can now replicate to my ZFS appliance in OCI.

zfssa remote replication


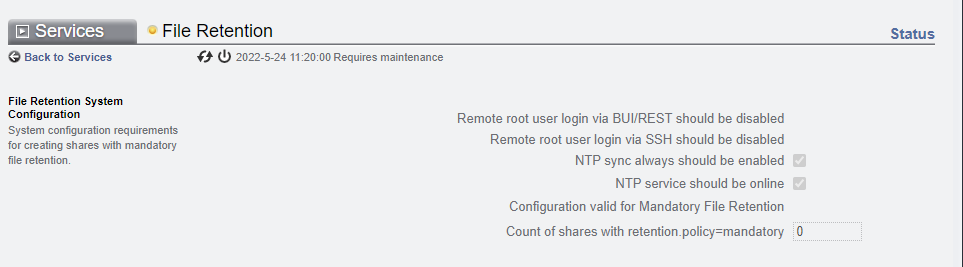
Step 2 -  Ensure the source project/share has "Enable retention policy for Scheduled Snapshots" turned on


For my example I created a new project "Blogtest".  On the "snapshots" tab I put a checkmark next to 
"Enable retention policy for Scheduled Snapshots".  By checking this, the project will adhere to preventing the deletion of any locked snapshots.  This property is replicated to the downstream and will cause the replicated project shares to also adhere to locking snapshots.  This can also be set at the individual share level if you wish to control the configuration of locked snapshots for individual shares.

Below you can see where this is enabled for snapshots created within the project.

ZFSSA Enable Snapshot Retention


Step 3 -  Create a snapshot schedule with "locked" snapshots


The next step is to create locked snapshots. This can be done at the project level (affecting all shares) or at the share level. In my example below I gave the scheduled snapshots a label "daily_snaps".  Notice for my example I am only keeping only 1 snapshot and I am locking the snapshot at the source. In order for the snapshot to be locked at the destination
  • Retention Policy MUST be enabled for the share (or inherited from the project).
  • The source snapshot MUST be locked when it is created
zfssa create snapshots

Step 4 -  Add replication to downstream ZFS in OCI

The next step is to add replication to the project  configuration to replicate the shares to my ZFS in OCI. Below you can see the target is my "downstream_zfs" that I configured in the "Remote Replication" service.
You can also see that I am telling the replication to "include snapshots", which are my locked snapshots, and also to "Retain user snapshots on target".  Under "Disaster Recovery" you can see that I am telling the downstream to keep a 30 day recovery point.  Even though I am only keeping 1 locked snapshot on the source, I want to keep 30 days of recovery on the downstream in OCI.

ZFSSA add replication

Step 5 -  Configure snapshots to replicate

In this step I am updating the replication action to replicate the locked scheduled snapshot to the downstream.  Notice that I changed the number of snapshots from 1 (on the source) to 30 on the destination, and I am keeping the snapshot retention locked. This will ensure that the daily locked snapshot taken on the source will replicate to the destination as a locked snapshot, and 30 snapshots on the destination will remain locked.  The 31st snapshot is no longer needed.

ZFSSA Autosnap replication


Step 6 -  Configure the replication schedule

The last step is to configure the replication schedule. This ensures that on a daily basis the snapshots that are configured to be replicated will be replicated regularly to the downstream. You can make this more aggressive than daily if you wish the downstream to be more in sync in the primary.  In my example below I configured the replication to occur every 10 minutes. This means that the downstream should have all updates as of 10 minutes ago or less. If I need to go back in time, I will have daily snapshots for the last 30 days that are locked and cannot be removed.

ZFSSA Replication Schedule

Step 7 -  Validate the replication


Now that I have everything configured I am going to take a look at the replicated snapshots on my destination.  I navigate to "shares" and I look under "replicat" and find my share. By clicking on the pencil and looking at the "snapshots" tab I can see my snapshot replicated over.

zfssa downstream copy

And when I click on the pencil next to the snapshot I can see that the snapshot is locked and I can't unlock it.

zfssa downstream locked


From there I can clone the snap and create a local snapshot, back it up to object storage, or reverse the replication if needed.


Friday, July 15, 2022

File Retention Lock on ZFSSA

File Retention Lock was recently released on ZFSSA and I wanted to take the time to explain how to set the retention time and view the retention of locked files. Below is an example of what happens. You can see that the files are locked until January 1st 2025

ZFS Retention Lock


The best place to start for information on how this works is by looking at my last blog post on authorizations.

First I will go through the settings that available at the share/project level


Grace period

The grace period is used to automatically lock a file when there has not been updates to the file for this period of time.
If the automatic file retention grace period is "0" seconds, then the default retention is NOT in effect.


NOTE: even with a grace period of "0" seconds files can be locked by manually setting a retention period. 
 Also, once a grace period is set (> "0") it cannot be increased or disabled.
Finally, if you set the grace period to a long period (to ensure all writes are to a file are completed), you can lock the file by removing the write bit. This does the same thing as expiring the grace period.

Below is an example

chmod ugo-w *

Running the "chmod" will  remove the write bit, and immediate cause all files to lock.

Default retention

The most common method to implement file retention is by using the default retention period. This causes the file to be locked for the default retention when the grace period expires for a file.
Note that the file is locked as of the time the grace period expires. For example, if I have a grace period of 1 day (because I want the ability to clean up a failed backup) and a default file retention period of 14 days, the file will be locked for 14 days AFTER the 1 day grace period. The lock on the file will expire 15 days after the file was last written to.

zfs file retention lock


In the example above you can see that all files created on this share are created with a default retention of 1 day (24 hours).

NOTE: If the grace period is not > "0' these settings will be ignored and files will not be locked by default.

Minimum/Maximum File retention

The second settings you see on the image above are the "minimum file retention period" and the "maximum file retention period".

These control the retention settings on files which follows the rules below.

  • The default retention period for files MUST be at least the minimum file retention period, and not greater than the maximum file retention period.

  • If the retention date is set manually on a file, the retention period must fall within the minimum and maximum retention period.

Display current Lock Expirations.

In order to display the lock expiration on Linux the first thing you need to do is to change the share/project setting "Update access time on read" to off . Through the CLI this is "set atime=false" on the share.


zfssa file retention lock

Once this settings is made, the client will then display the lock time as the "atime". In my example at the top of the blog, you can see by executing "ls -lu" the file lock time is displayed.

NOTE: you can also use the find command to search for files using the "atime" This will allow to find all the locked files.

Below is an example of using the find command to list files that have an lock expiration time in the future.


export CURRENT_DATE=`date +"%y-%m-%d %H:%M:%S"`
find . -type f -newerat "$CURRENT_DATE" -printf '%h\t%AD%AH:%AM:%AS\t%s \n'


Manually setting a retention date


It is possible to set a specific date/time that a file is locked until. You can even set the retention date on a file that currently locked (it must be a date beyond the current lock data).

NOTE: If you try to change the retention date on a specific file, the new retention date has to be greater than current retention date (and less than or equal to the maximum file retention period). This makes sense.  You cannot lower the retention period for a locked file.

Now how do you manually set the retention date ?  Below is an example of how it is set for a file.

Setting File retention lock

There are 3 steps that are needed to lock the file with a specific lock expiration date.

1. Touch the file and set the access date. This can be done with
    • "-a" to change the access date/time
    • "-d" or "-t" to specify the date format
 2. Remove the write bit with chmod guo-2

3.  execute a cmod to make the file read only.

Below is an example where I am taking a file that does not contain retention, and setting the date to January 1, 2025.


First I am going to create a file and touch it setting the atime to a future data.

$echo 'xxxx' > myfile4.txt

$ls -al myfile4.txt
-rw-r--r--. 1 nobody oinstall 5 Jul 15 20:40 myfile3.txt

$ls -lu myfile3.txt
-rw-r--r--. 1 nobody oinstall 5 Jul 15 20:40 myfile3.txt

$ touch -a -t "2501011200" myfile3.txt
$ ls -lu myfile3.txt
-rw-r--r--. 1 nobody oinstall 5 Jan  1  2025 myfile3.txt
$rm myfile3.txt
$ls -lu myfile3.txt
ls: cannot access myfile3.txt: No such file or directory


You can see that I set the "atime" and it display a future date, but I was still able to delete the file.

Now I am going to move to  remove the write bit before deleting.

$echo 'xxxx' > myfile4.txt

$ls -al myfile4.txt
-rw-r--r--. 1 nobody oinstall 5 Jul 15 20:40 myfile3.txt

$ls -lu myfile3.txt
-rw-r--r--. 1 nobody oinstall 5 Jul 15 20:40 myfile3.txt

$ touch -a -t "2501011200" myfile3.txt
$ ls -lu myfile3.txt
-rw-r--r--. 1 nobody oinstall 5 Jan  1  2025 myfile3.txt
$chmod ugo-w  myfile3.txt
$rm myfile3.txt
ls: cannot access myfile3.txt: No such file or directory


Still, I am able to delete the file.. Finally I am going to do all three 

$echo 'xxxx' > myfile4.txt

$ls -al myfile4.txt
-rw-r--r--. 1 nobody oinstall 5 Jul 15 20:40 myfile3.txt

$ls -lu myfile3.txt
-rw-r--r--. 1 nobody oinstall 5 Jul 15 20:40 myfile3.txt

$ touch -a -t "2501011200" myfile3.txt
$ ls -lu myfile3.txt
-rw-r--r--. 1 nobody oinstall 5 Jan  1  2025 myfile3.txt
$chmod ugo-w  myfile3.txt
$chmod a=r  myfile3.txt
#$rm myfile3.txt
rm: remove write-protected regular file ‘myfile3.txt’? y
rm: cannot remove ‘myfile3.txt’: Operation not permitted


Summary to manually set the lock on a file

If the file is NOT current locked  (the grace period is "0" or the grace period has not expired).


The commands below will lock the file "myfile.txt" until 01/01/25 12:00.

touch -a -t "2501011200" myfile.txt
chmod ugo-w  myfile.txt
chmod a=r  myfile.txt


If the file is already locked 

The commands below will adjust the lock on the file "myfile.txt" until 01/01/25 12:00.


touch -a -t "2501011200" myfile.txt


Tuesday, July 5, 2022

ZFSSA File Retention Authorizations

ZFS File Retention authorizations is important to understand if you plan on implementing retention lock on ZFS. This feature was added in release OS8.8.46. and there is a MOS note explaining how it works (2867335.1 - Understanding ZFS Appliance File Retention Policy).
In order to start using the new features, you need to grant some new authorizations that manage who can administer the new settings.  Be aware that these new authorizations are NOT granted to the administrator role.  You must add them to the administrator role or create an additional role.


ZFS file retention authorizations

The image above shows the File Retention Policies that can be set and which authorization is needed to administer each setting.

NOTE: The share must be created with file retention in order to have these settings take effect.  You cannot add file retention to an existing Project/Share.


Now let's go through the 3 Authorizations and what they allow the administrator to do.

retentionPeriods


When an administrator is granted the "retentionPeriods" authorization they are given the authority to administer 3 of the setting for file retention

  • "Minimum file retention period" - This is the minimum amount of time in the future that you can set a file retention to be. If you set the file retention date manually the retention time must be at least this far if not longer in the future. If you set the "Default file retention period", it must be at least the "Minimum file retention period" if not longer.  The default value for this setting is "0 seconds".
  • "Maximum file retention period"- This is the maximum amount of time in the future that you can set a file retention to be. If you set the file retention date manually the retention time must at most this far if not shorter in the future. If you set the "Default file retention period", it must be at most  the "maximum file retention period" if not shorter. The default value for this setting is "5 years".
  • "Default file retention period"- This is the default amount of time in the future that you can set a file retention to be.  This value has to fall within the minimum and maximum file retention period.  Unless this value is set to a value greater than "0 seconds" no files are locked by default.

NOTE : The most common method used to lock files is to set the "Default file retention period" to a value greater than '0 seconds". When this is set (and file retention is turned on) any files created will be locked for this period of time.

retentionAuto


When an administrator is granted the "retentionAuto" authorization they are given the authority to set the Automatic file retention grace period.
This value controls how long after the last access time the ZFS waits to lock the file.  The default setting is "0 seconds".  Until this value is set to a value greater than "0 seconds" no files are automatically locked (using the Default file retention period).  The only method to lock files when this value is left as "0", the default, is to manually lock files.

NOTE: A very important item to understand is that the ZFS locks the file once it has not been updated for this period of time. If you have a process that holds a file open without writing to it, for example an RMAN channel, it may lock the file before it is closed.
Be sure to set the grace period to be longer than the amount of time a process may pause writing to a file.  DO NOT set it too short.  If you wish to lock a file immediately after you have finished writing to it (because you have a long grace period) you can remove the "w" bit from the files using chmod. This will bypass the grace period.
If the share is configured with mandatory retention, the automatic grace period cannot be increased, it can only be lowered.

retentionMandatory


When an administrator is granted the "retentionMandatory" authorization they are given the authority to create a share with a "mandatory (no override)" file retention.  This authorization is not necessary to create a "privileged override" file system.
Be aware that in order to create a file system with "mandatory" file retention the ZFS must be configured with the following settings. The "file retention" service must be running, and the file system needs to be a mirrored configuration

  • Remote root user login via the BUI/REST needs to be turned off in the HTTPS service
  • Remote root login via SSH needs to be turned off in the SSH service
  • NTP sync needs to be configured in the NTP service
  • NTP service needs to be on-line.

NOTE : You must ensure that the ZFS administrator is granted these authorizations before attempting to configure file retention. If the administration user is not granted the proper authorization you will permission errors like below.


"You are not authorized to perform this action. If you wish to proceed, contact an administrator to obtain the proper credentials.